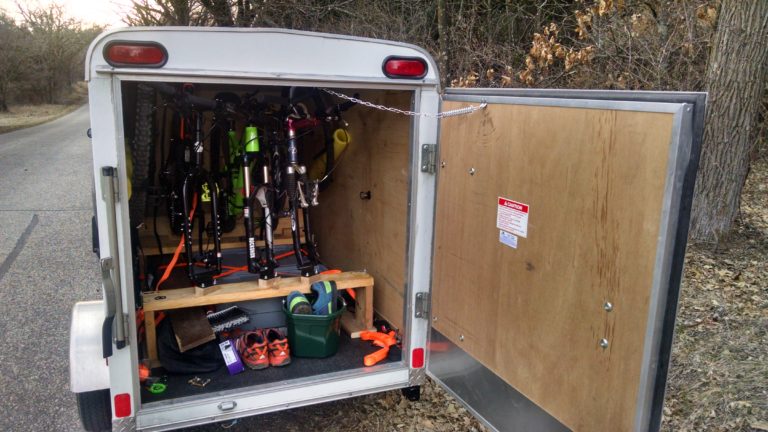
This is a project that I completed back in 2018. I decided to upfit an enclosed trailer for the following purposes:
Firstly, to transport one or more bikes in safety from prying eyes and the elements. (Duh!)
Secondly, to provide a place to sleep in a pinch. I usually tent camp, but tents come with their own set of extra tasks both before and after the trip, especially if the weather is nasty or the ground is muddy. An enclosed trailer will allow me to either sleep in the trailer, or move enough gear into the trailer to make room for a bed in my station wagon.
With the small towing capacity of my car, I need the smallest trailer possible, which means making the best possible use of space, which means engineering (or stealing from online) some clever solutions. Of course it will have to be modular so I can use the trailer for regular hauling missions as well.
On to the trailer!
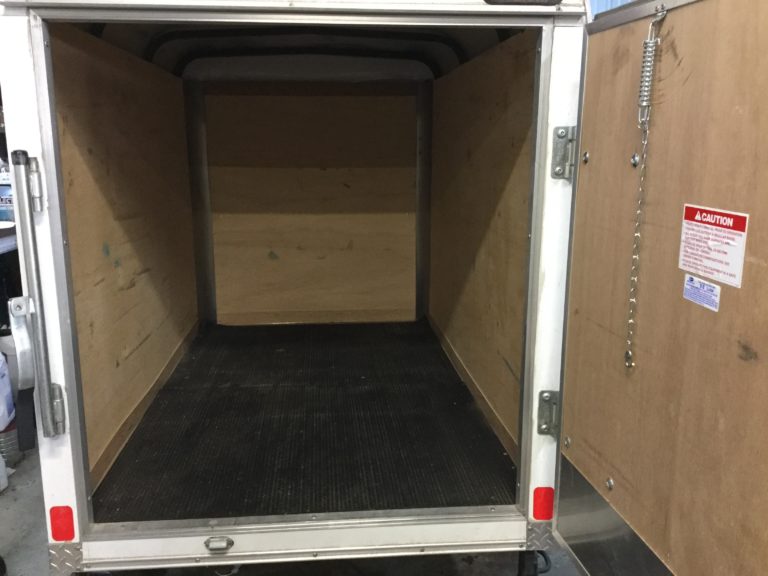
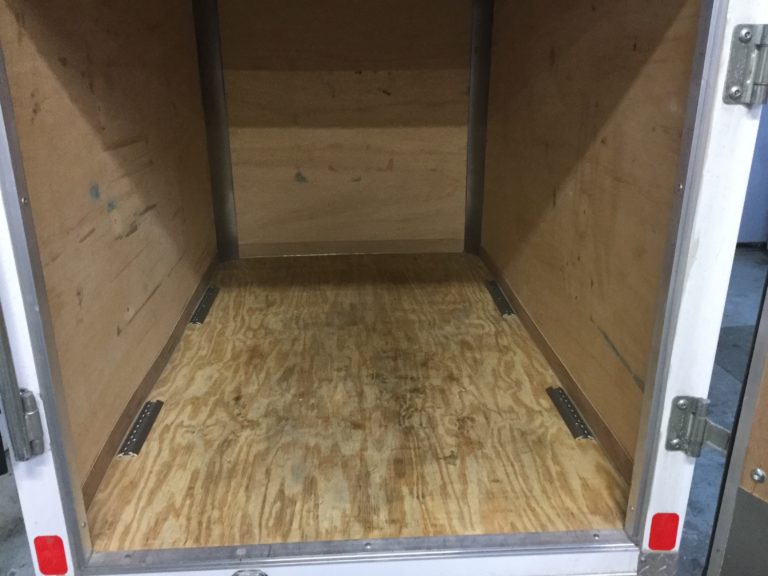
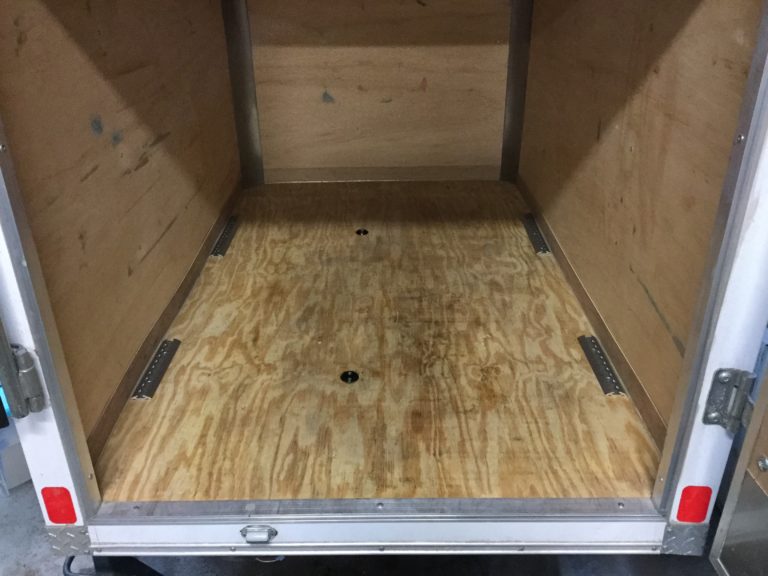
I bought a 4′ by 6′ 2006 Pace American trailer secondhand.
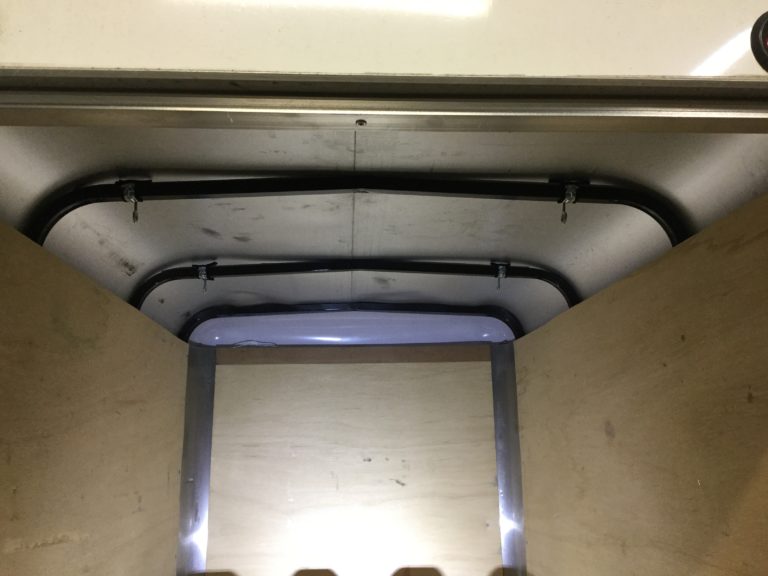
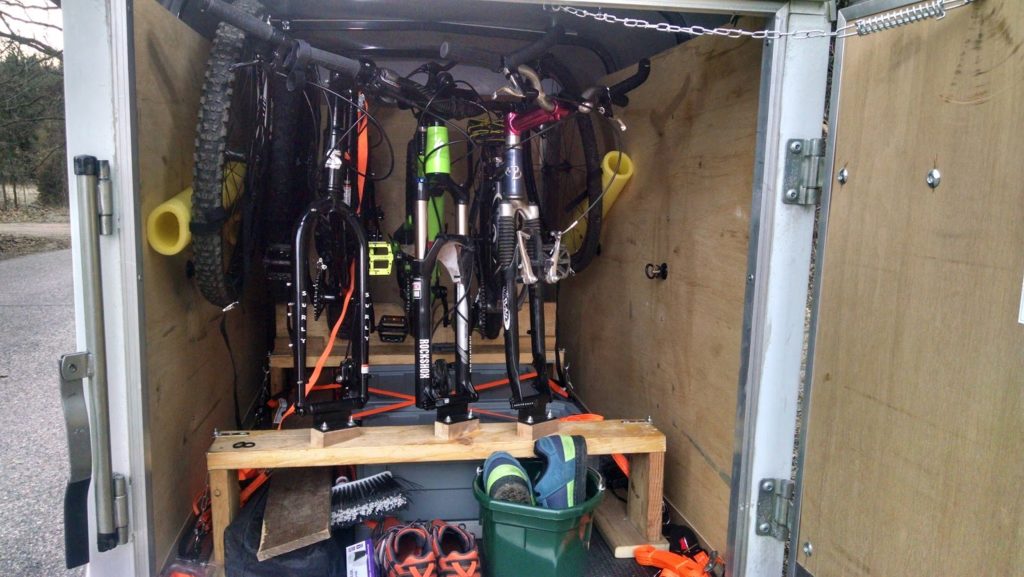
Since the trailer has some headroom over the height of an average mountain bike, I decided to create some space underneath the bikes for more equipment.
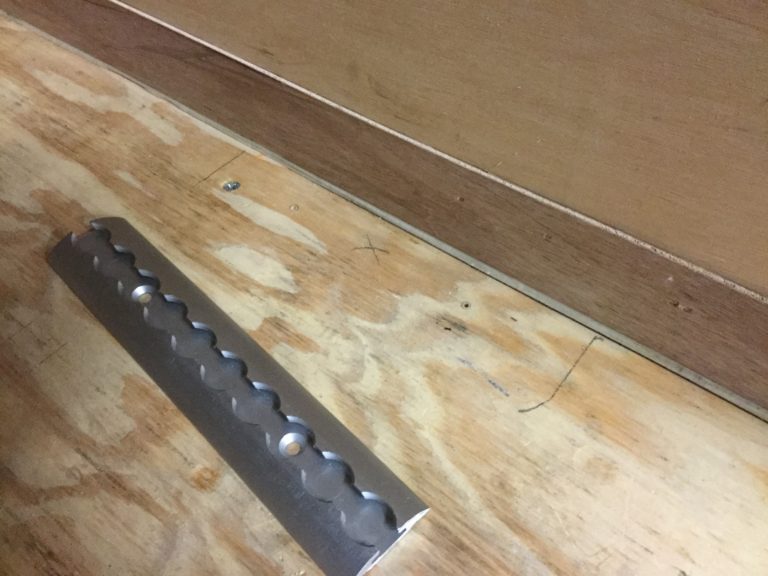
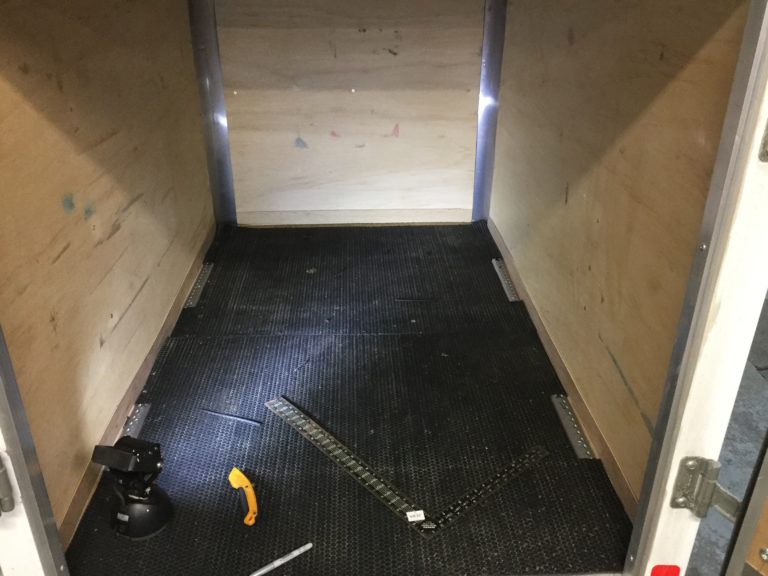
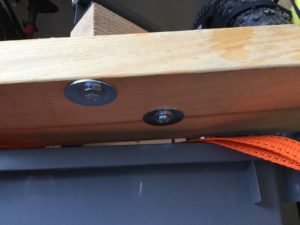
To secure this system I used “O-track”:
O-track is more expensive and less robust than the popular e-track system, but less obtrusive and very light.
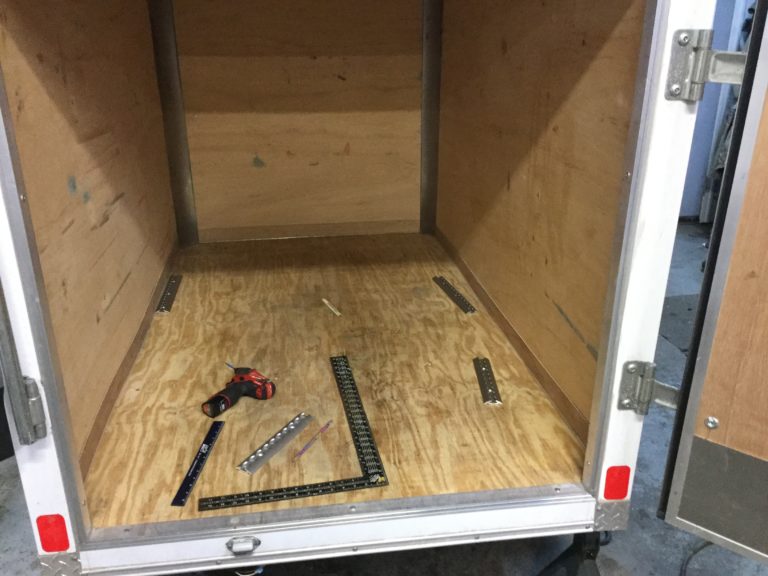
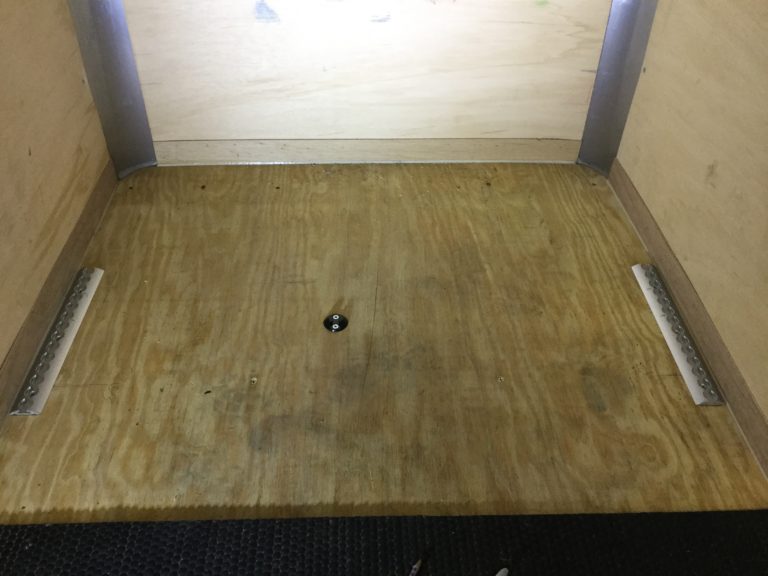
I bought a single 3-foot piece of the track and cut it into four sections. I also bought some one-spot tie down points, which will show up later in the project.
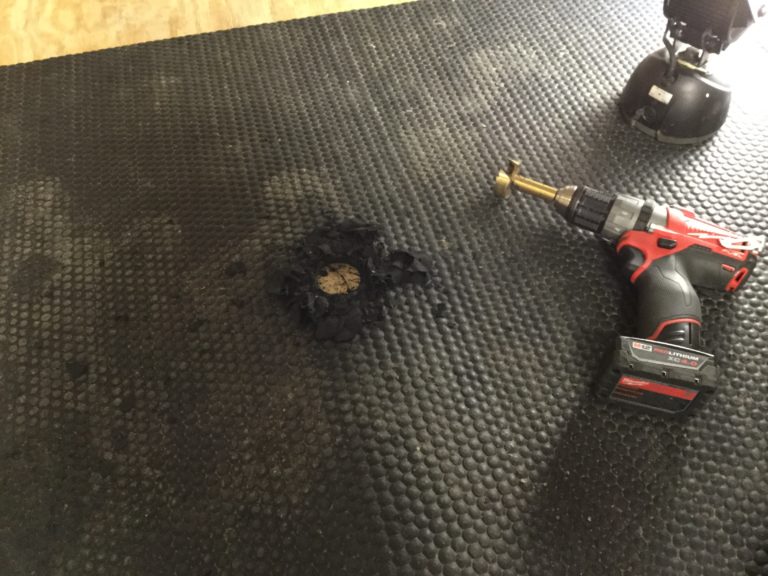
Measure, mark, measure again, step back and eyeball it to make sure everything looks right and I didn’t get the numbers messed up, then measure one more time before drilling the pilot holes to screw down the track sections.
Then re-install the rubber floor mats and cut to fit.
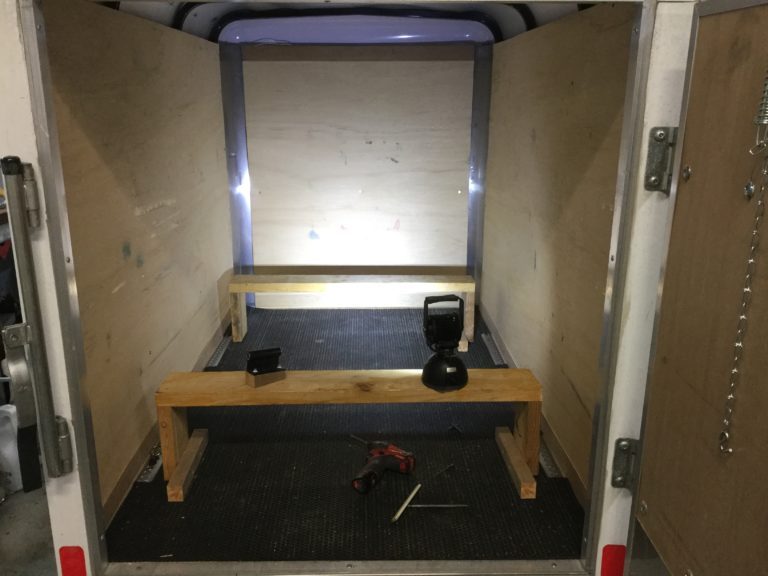
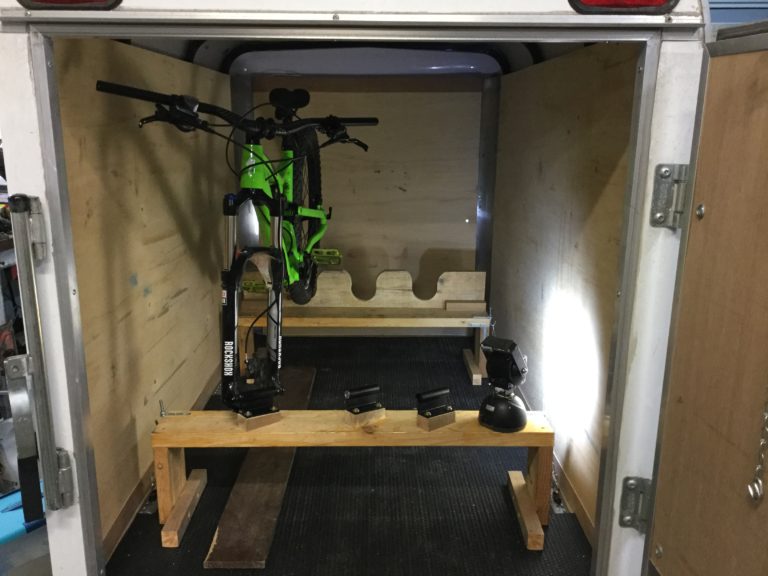
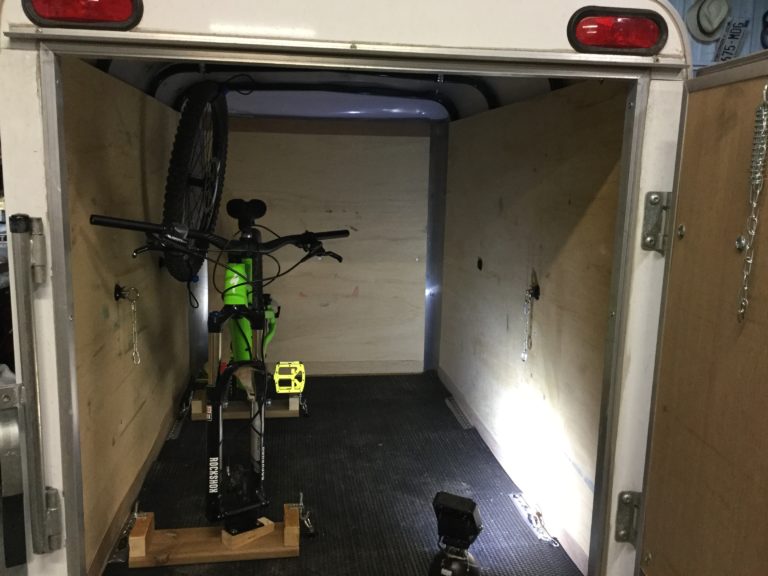
Elevating the bikes to make use of the headroom is pretty simple. Shelves!
(You will notice that parts of the shelves, as well as possibly other bits of this project, will morph a bit throughout the build as I fine-tune things. Some of the pictures will be out of chronological order so it might be confusing.)
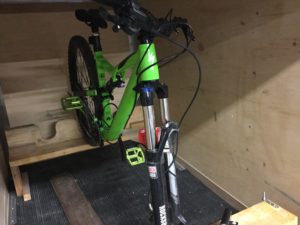
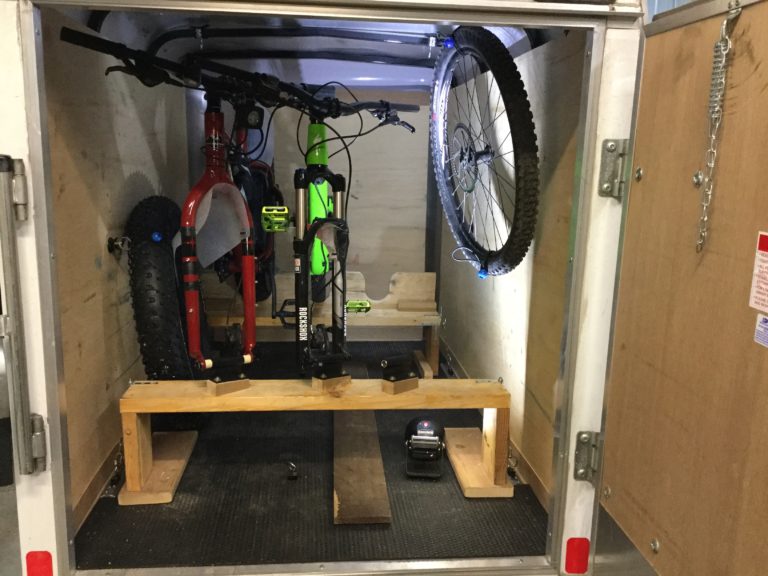
At this point I was still unsure whether I’d be able to fit three bikes in there, or only two. So I did a test fit and determined that three would be feasible.
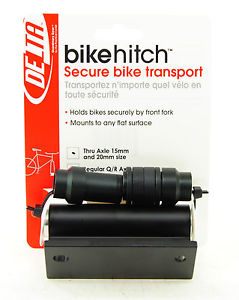
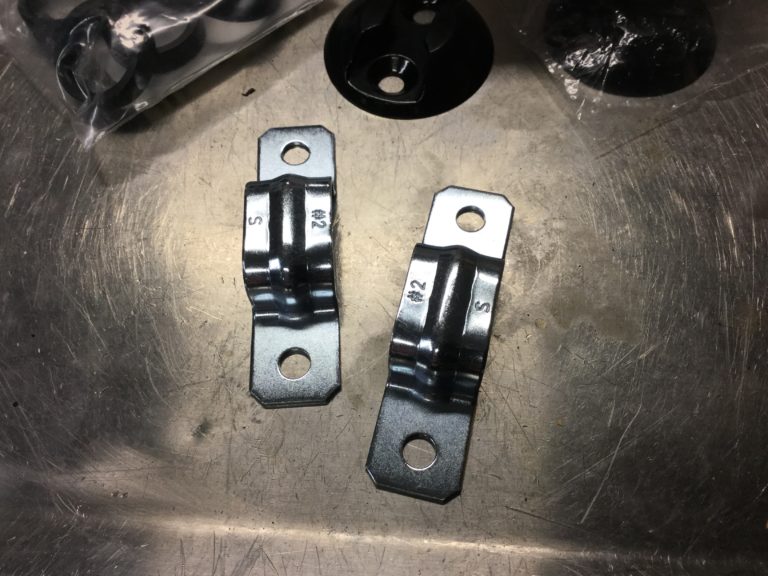
To secure the forks, I selected Delta brand fork blocks for the price-to-quality ratio as well as the wide range of hub and axle sizes that they can accommodate. NOTE that there are two packagings of this block, one of them has all the shims to fit pretty much any hub width up to 150mm (pictured) and the other only includes the block (standard 100mm width) and two 5mm shims to fit a 110mm boost hub.
Some listings online are deceptive, don’t trust the pictures to guarantee that the block you’re buying is the version with all the shims.
I ended up buying one fat-compatible version off Ebay from a seller named Abaxo, and three of the 100-110mm versions from Nashbar.com and had a solid experience with both of those sellers.
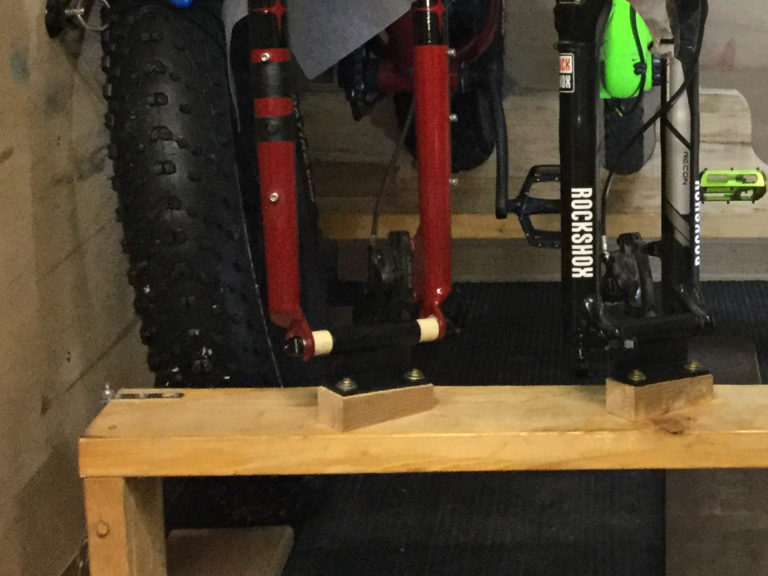
While I’m at it, I’ll jump ahead of myself for a moment and mention that I later bought a 135mm quick-release adapter for my fat bike from Velofuze.com. It slides inside the 15mm sleeve of the Delta block. I cut two sections of PVC pipe to shim the 135mm adapter from sliding side-to-side in the 100mm wide block. Here’s a photo from much later in the project:
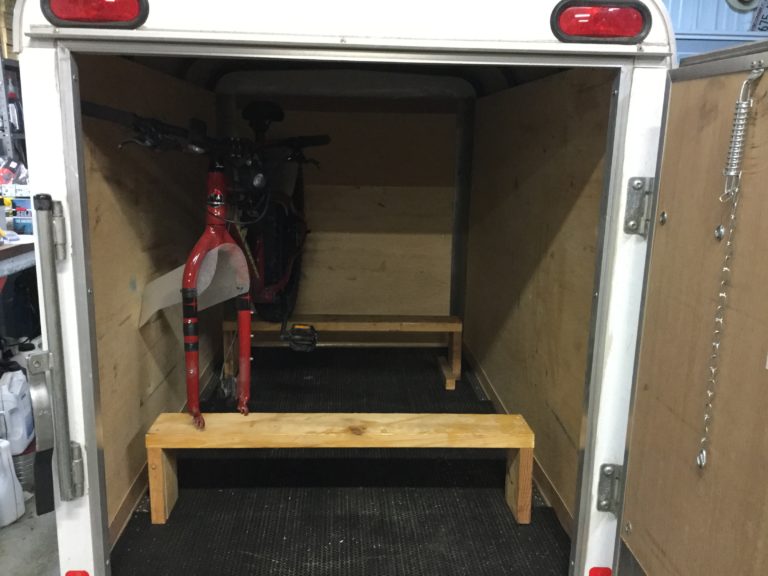
In the above picture you can also see that the fork blocks are mounted on wooden shims which have been machined to an angle (I used a disc sander). This is so that the bikes will stand approximately upright with the handlebars turned. Otherwise the bikes will lean a bit due to the rake in the forks. The actual angle isn’t critical, different bikes have different rake angles so I found a happy medium that allows steep-raked road bikes to sit next to slack-raked mountain bikes.
The amount of angle required in the shims is also determined by the degree that the fork will be turned when the bike is secured!
I mounted the blocks at 50 degrees from perpendicular to the shelf, as that seems to be a good compromise between stability and allowing the handlebars to fit 3-wide in the trailer. Again, this calculation is not scientific. Just determined by trial fitting.
The wooden shims also serve to raise the axles above the shelf enough so that a quick-release lever can clear while inserting or removing the axle.
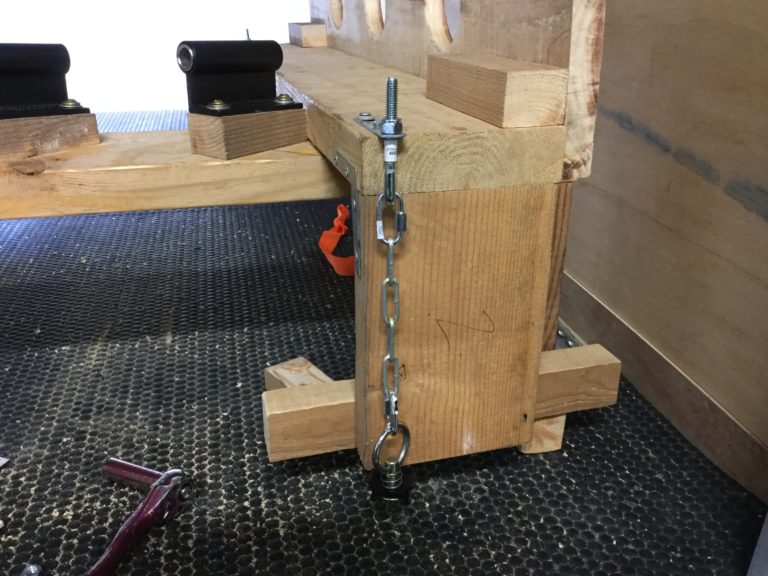
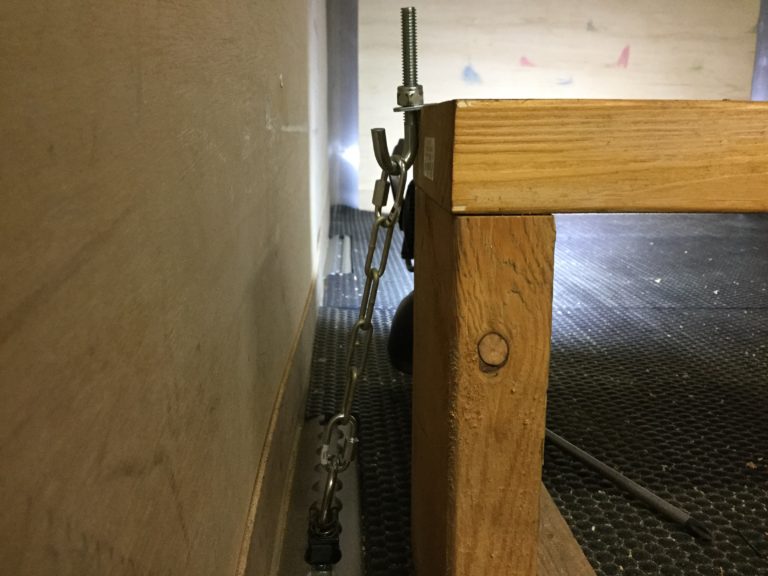
You might have noticed the rear-wheel retention system in that photo as well, and that’s the next step in this project! Since there won’t be room to get into the forward region of the trailer after three bikes are loaded, I need a system that will secure the rear wheels from lateral movement without the need to secure any tie-downs. Again, the simplest solution presented itself:
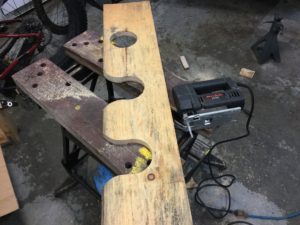
The retention system for the shelves is pretty primitive as well and allows them to be easily removed:
And with that, the multi-bike floor configuration is done.
UPDATE: In the construction pictures you’ll see that I used large lag screws to secure the fork blocks. Don’t do this. During a test run with a bike loaded, I noticed that they can rapidly work loose. I replaced the screws with through-bolts and locknuts and have not had a problem since.
Configuring for a Single Bike
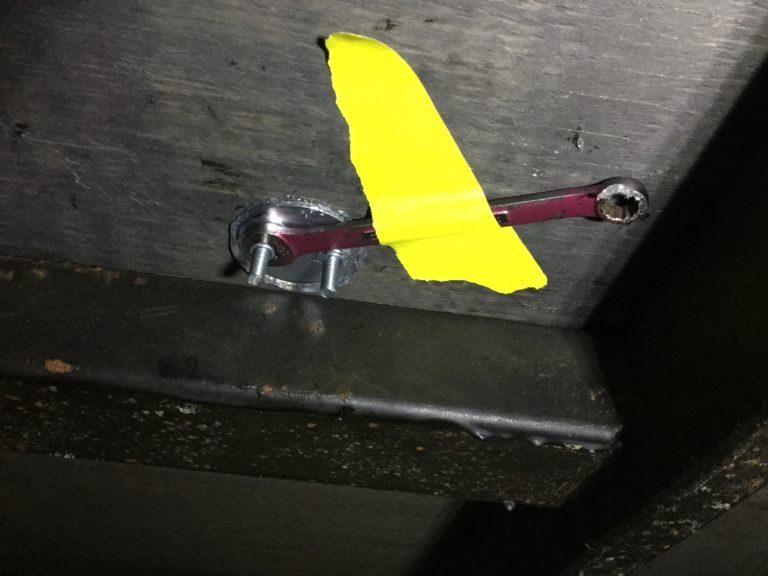
To haul a single bike and make room for extra cargo, I installed two additional O-track anchors in the floor. I offset them to the left in order to avoid conflicts with the frame underneath the floor, and also to maximize the trailer’s versatility for different-sized items.
I also added four O-track anchors to the sides, secured to the steel ribs with self-tapping screws.
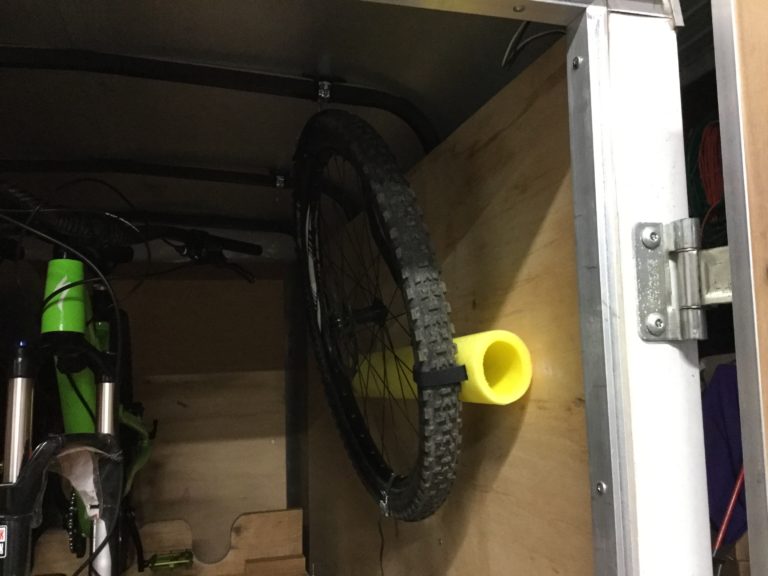
Front Wheel Storage
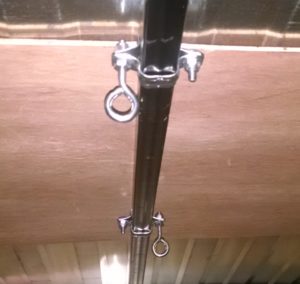
The front wheels are suspended from the roof ribs and secured from swinging by the wall anchors.
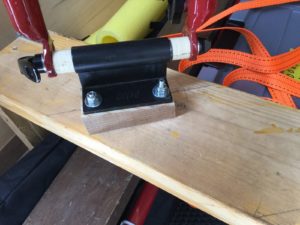
Rather than drill into the ribs, I used a simple clamping assembly of 1″ metal straps (available in the electrical aisle of most hardware stores) and eye bolts.
Here’s a picture of another trailer I used this method on:
To keep the wheels snug and prevent them from flopping on the yaw axis, I bought some pool noodles and cut them to the diameter of the wheel. Velcro straps, fed through slots melted in the pool noodles, keep them in place on the wheel.
To secure the wheel, I used sleeping-bag straps from the camping aisle. They’re basically miniature motorcycle tie-downs, and are easily up to the task.
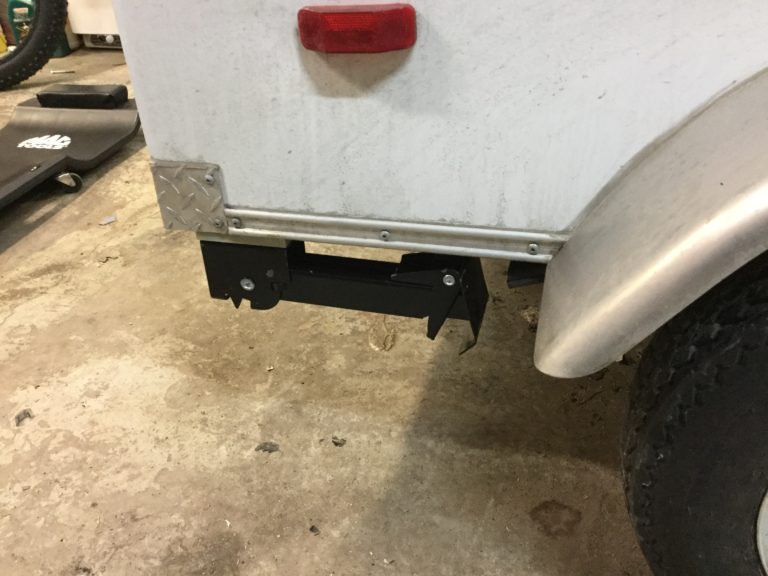
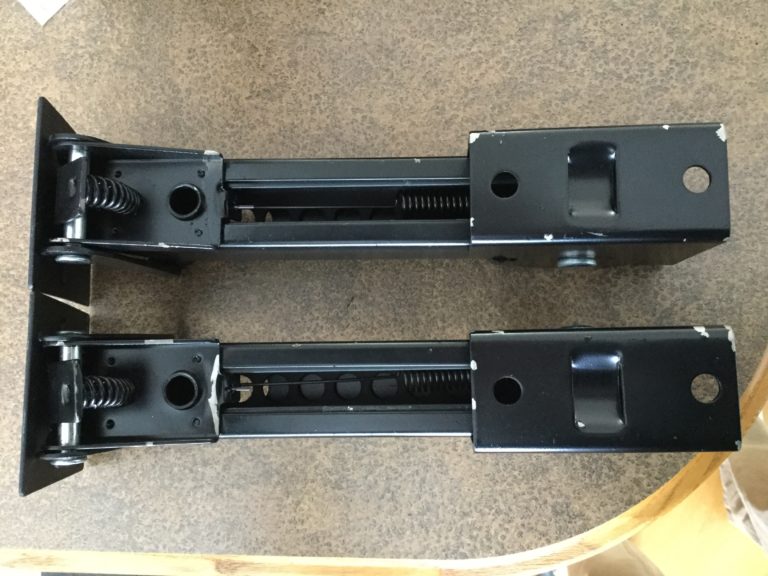
Landing Gear
The “landing gear” is to keep the trailer solid when it’s not hitched to a vehicle. They also can be used in conjunction with the trailer’s tongue jack to level the trailer or lift the wheels off the ground for changing a tire.
I bought mine from southwestwheel.com. I was a little trepidated by reviews of this site online, but the package did arrive although it was late and looked like it had been thrown down a flight of stairs. Not SW Wheel’s fault, that’s on the USPS. These are the same inexpensive jacks that can be found on Amazon.com for around $30 a pair. I paid a few dollars less by ordering directly from SW Wheel.
There are three main issues to address on these jacks:
1. Hilariously-poor paint quality 2. Weak spot-welds on the feet (Amazon reviews mention this) 3. Must be shimmed or the feet will contact the frame when folded.
For the price, I’m willing to forgive some flaws, but even so I have to reiterate that the paint on these is ludicrously bad. Large bits of paint had already flaked off from shipping, and I removed a good bit more with my fingernail. Still more of it flew off when hit with a blast of compressed air. Plan on repainting these before use.
Here’s what they looked like fresh out of the shipping box. Note the touch-up spray job, not sure if this was done by SW Wheel or at the factory.
The inner sliding section of each jack is painted with a flat black paint which is different from the paint on the main body. Don’t repaint this part! The locking piece relies on friction with this part, and unlike the outer paint, the paint on the inner sliding sections is quite durable.
The easy way to repaint the jacks without painting the inner slides is to simply paint them in the collapsed configuration. I used cheap implement enamel for which I paid $5.00 for a spray can.
For prep, I simply sprayed the jacks down with brake cleaner and then dried them with a compressed-air gun. I didn’t see fit to spend a lot of time making these showroom-quality.
I opted to bolt the jacks on rather than weld them, since I want to be able to remove them easily for replacement or repair.
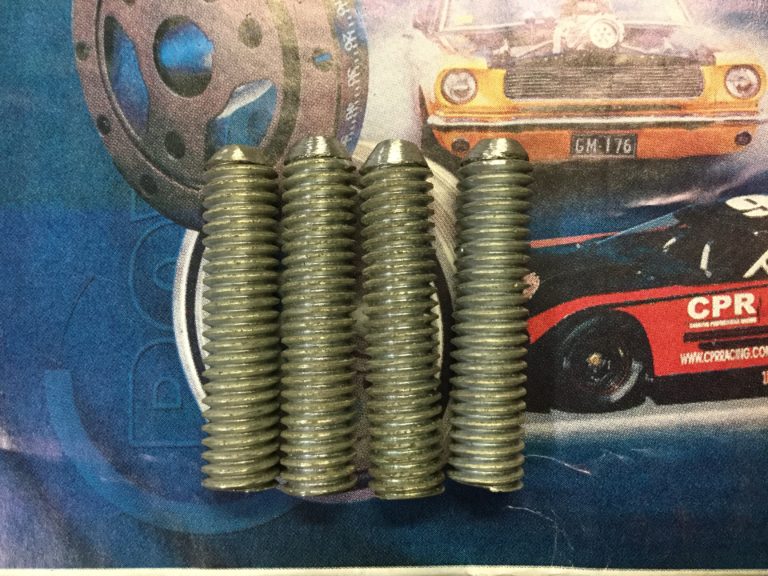
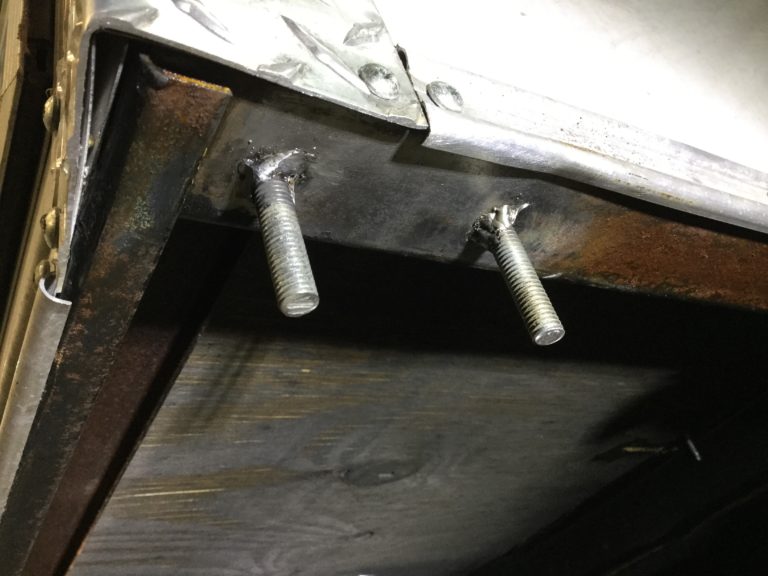
I cut four studs from 3/8″ threaded rod:
Tip:
Put a wrap or two of masking tape around the threaded rod before cutting. This will make it easier to mark your length without shredding up the tip of your marker, and also protect the threads so you can lightly clamp the rod in a vise for cutting.
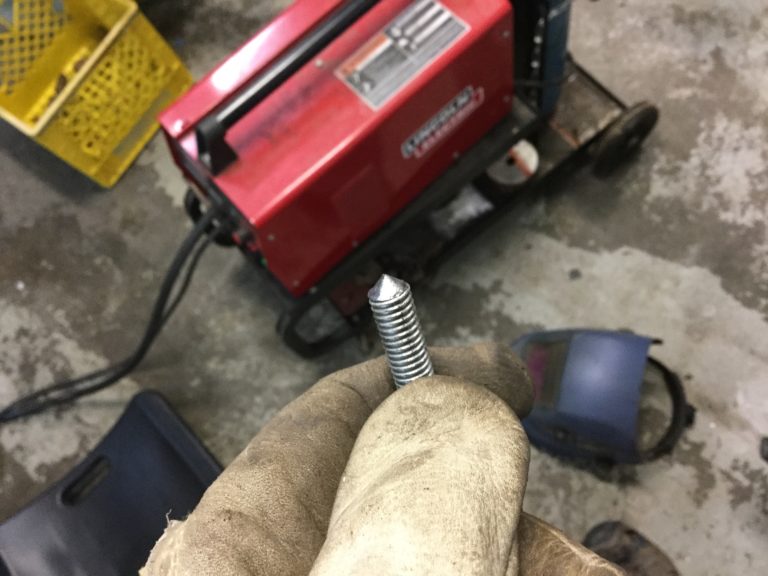
Another Tip:
While you’ve still got the tape around your freshly-cut sections, chuck them gently into a hand drill and spin the drill while you grind the weld ends to a point on your bench grinder. This will yield a nice symmetrical cone which will self-center in your punch marks and allow for a deep weld.
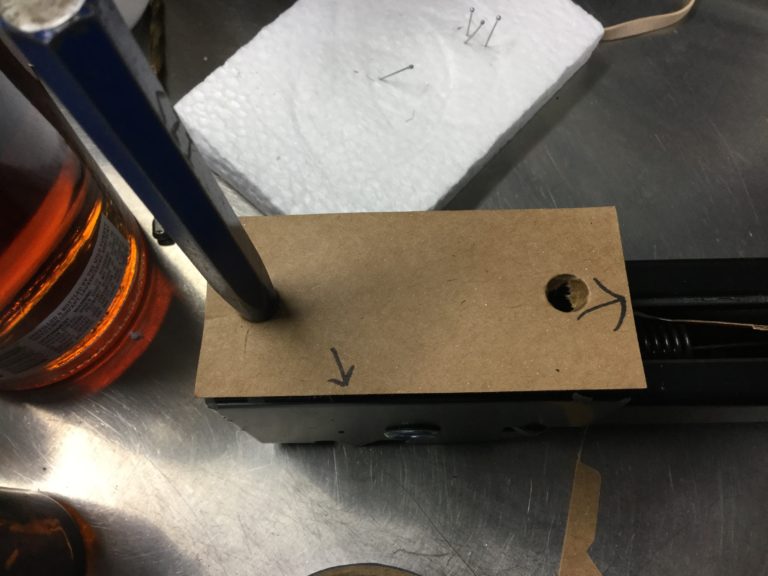
The next step was to make a cardboard template from the holes in the jack. The arrows are to indicate which sides of the template to orient to the front and outside of the frame when marking.
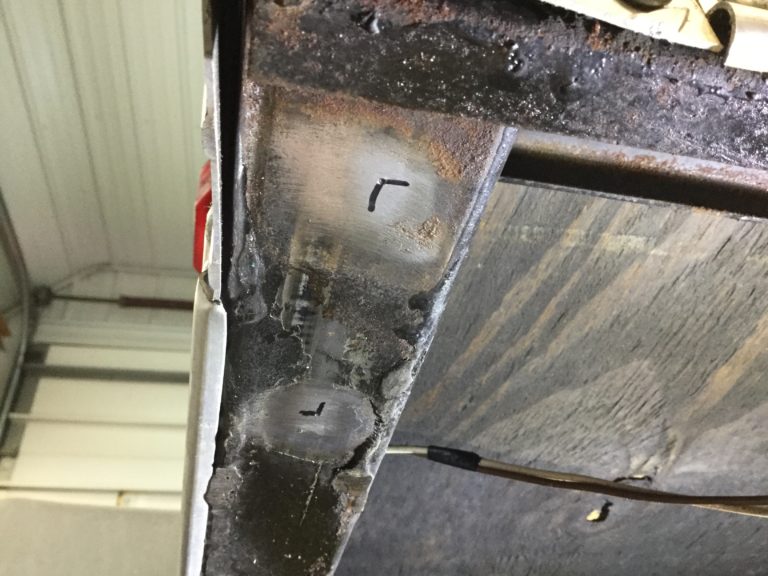
I used the template to mark the stud locations on the frame, then used a square as well as the good ol’ eyeball to verify that the marks were in the right spot before dimpling each location with a center punch.
Then I welded the studs on nice and straight and hit them with a quick shot of cheap implement enamel.
Since you’ve got the welder deployed, now is a good time to reinforce the poorly-welded feet on the jacks.
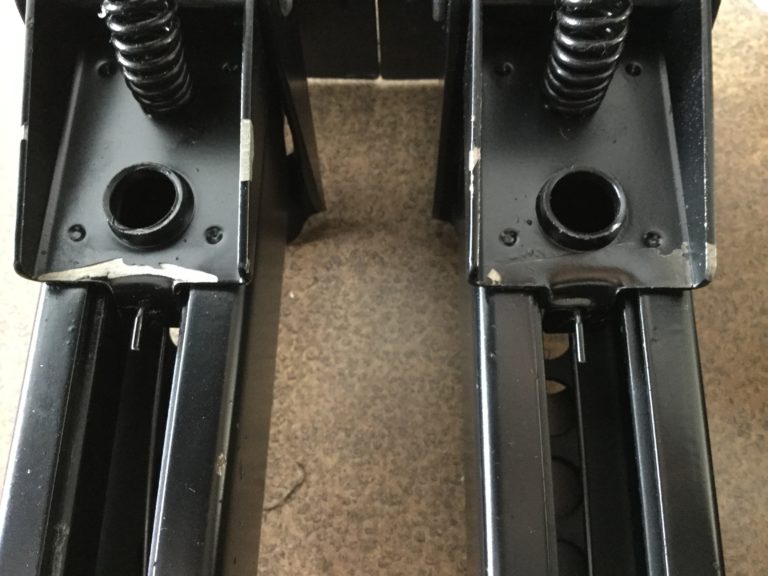
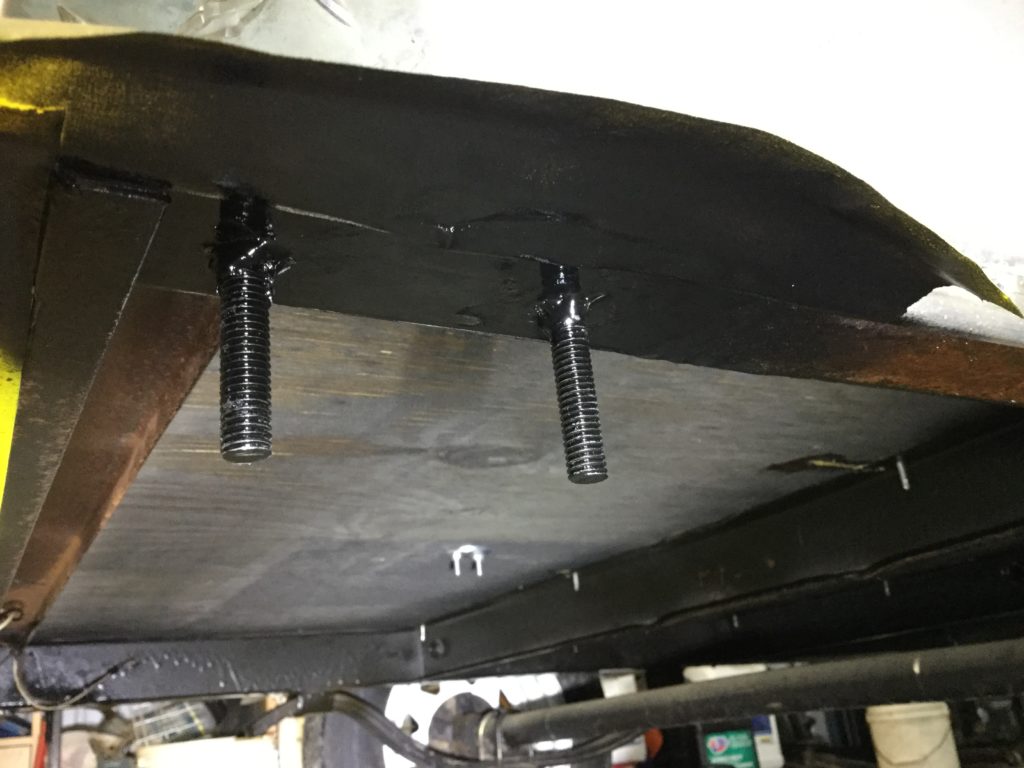
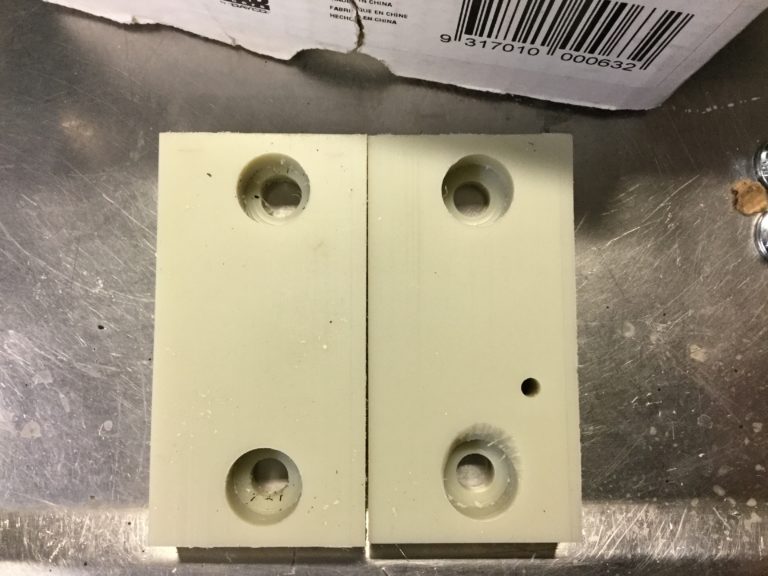
The next step was to make some shims. I consider it a design flaw that the locking mechanism near the foot will hit the frame when the jack is folded up. Easily remedied with about 1/2″ of shim but still annoying.
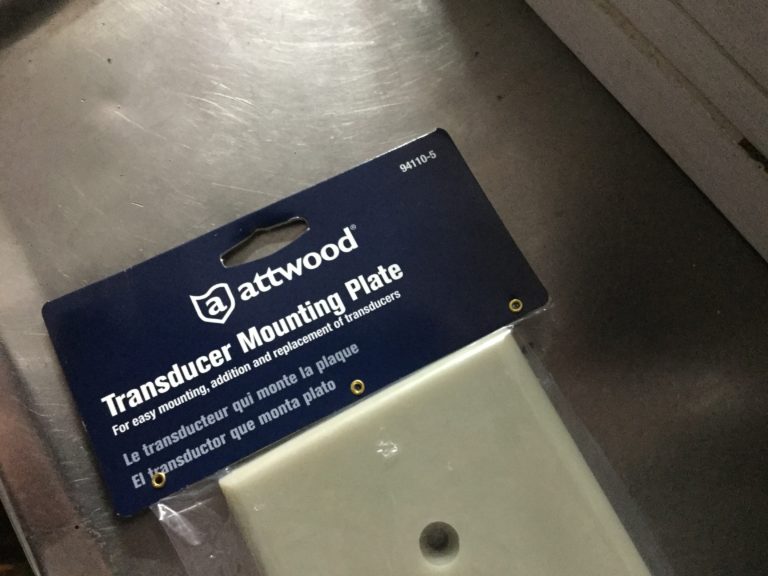
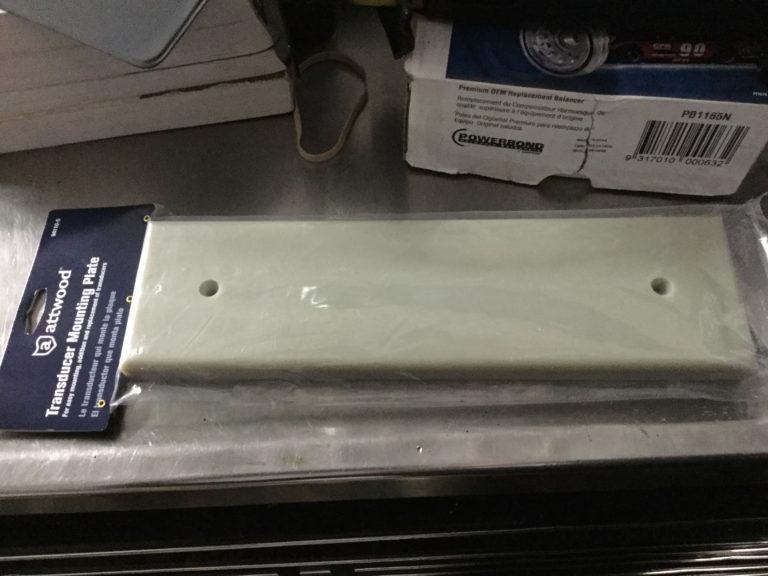
For shim material, I was looking for a plastic cutting board but instead spent a little more on a transducer mounting plate from the boat accessories aisle. It cost about $16 and is nearly the perfect thickness.
The mounting plate is a real joy to machine, predictable and soft. It has proven to be excellent material for this application.
The counter-sunk holes are to accommodate the welds around the studs and allow the shim to press flat against the frame. I used my cardboard template again to lay these out before cutting and drilling.
Shims and jacks installed. Here you can see how close the jacks lay to the trailer frame even when shimmed.
You may also have noticed in the above picture that the jack foot is bent to an angle at the toe. This is to provide additional clearance when swinging the jack down. And it just looks better.
Anyway I think that covers this project. If you’d like clarification or have suggestions, please contact me.
Otherwise click here to return to the Projects hub, or here for my home page.